
迷你披萨~面包机版
- 烘焙

- 咸鲜味

- <90分钟

- 初级入门

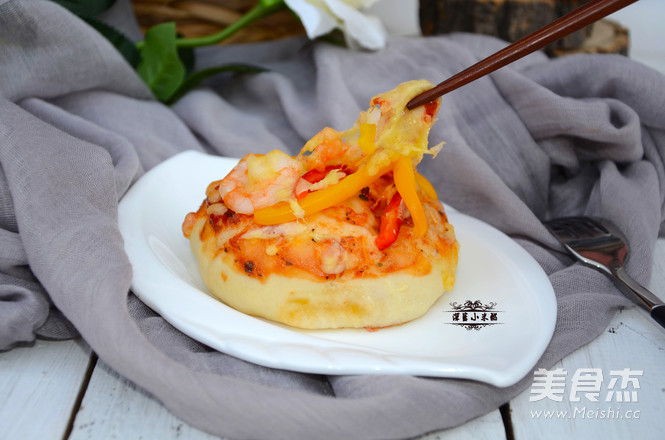
迷你披萨特适合小朋友吃,拿着也比较方便!用面包机来和披萨饼面团,省时省力,特别方便!
展开

迷你披萨~面包机版营养建议
-
含糖量 19.39克高血糖 尽量不吃
-
高血脂 控制少吃
-
高血压 控制少吃
-
减肥 控制少吃
-
儿童 控制少吃
迷你披萨~面包机版的食材2人份
- 高筋面粉130克
- 低筋面粉30克
- 纯净水100克
- 酵母(干)3克
- 白砂糖6克
- 食盐2克
- 披萨酱50克
- 黄油10克
- 奶酪80克
- 蔬菜30克
- 虾仁6个
- 培根2片
展开

迷你披萨~面包机版的做法
1


准备好高筋面粉130克,低筋面粉30克,纯净水100克,白砂糖6克,食盐2克,黄油10克,干酵母3克
2


首先制作饼底面团:将除了黄油以外的所有材料都放进面包机里面
3


在手机上启动面包机的披萨面团程序
4


面包机大概和面17分钟之后,程序跳到“搅拌2”的时候暂停,加入黄油,继续揉面
5


将揉好的面团放入发面盆里,盖上盖子或保鲜膜进行基础发酵,一直要发酵到2倍-2.5倍大小,25℃室温下大约需要1个小时
6


1个小时之后,手指沾少许面粉,插 入面团。拔出手指后,小圆孔不回缩也不塌陷,就表示发酵好了(如果圆孔回缩,表示发酵不够。如果圆孔塌陷,则发酵过度了)
7


将发酵好的面团取出来放在面包机里,重新揉面约5分钟,等面团排气之后揉成圆形,用保鲜膜包上,室温醒发15分钟
8


然后在涂了油的硅胶揉面垫上,擀开,然后用用圆形慕斯模切出圆形面片
9


把圆形面片放在铺了油纸的烤盘上,抹上披萨酱
10


撒上一层马苏里拉
11


放上蔬菜、虾仁和培根等自己爱吃的食材
12


再撒上一层马苏里拉,烤箱提前预热,上下火200度10分钟
13


将做好的迷你披萨放入预热好200℃的烤箱,烤12分钟左右,香喷喷的比萨就出炉了!
14


刚出炉的披萨拉丝效果非常好哦!
成品图
迷你披萨~面包机版的烹饪技巧
这款迷你披萨里面的蔬菜、肉类可以根据自己的喜好随意更改,力求口感更丰富!
版权声明:
除非特别标注,否则均为本站原创文章,转载时请以链接形式注明文章出处。
迷你披萨~面包机版标签:迷你披萨~面包机版的做法 迷你披萨~面包机版的家常做法 迷你
上一篇上一篇:用南瓜做出法式小面包的口感,我家少爷一口气吃6个,还说不过瘾
下一篇下一篇:荔枝杨梅冰糖汁
快乐的猫


评论列表
真的是厉害啊,爱了爱了
2021年06月15日 13:07